3. THE SOUNDBOARD - WITH MANY TIPS

Published on 1. April 2013 by Johannes Huefken

Today is our first day in the worksh

Well, you don't have to wear hearing protection and safety glasses! Nevertheless an important hint from me!

Not a single step or tip is a truth carved in stone. With all my joy at my success, you can only share in my experiences. So if I use vocabulary like "must" and "should", it only affects my current level of knowledge. This is a product from the lessons with my highly esteemed harpsichord maker, literature and practice (including mistakes). I won't always quote my teacher. Assume that I am a beginner in harpsichord making and that a lot of knowledge comes from my master.

This blog post is about the soundboard. In 5 points we get from the cut goods to the soundboard.

  1. The wood selection
  2. Dressing
  3. The gluing
  4. The coarse cut
  5. Planing out


1. The choice of wood

The well dried fine-grained spruce wood is cut to a thickness of approx. 12 mm. The thin boards then have a width of 60 - 130 mm.

Tip: Although the wood may grow a little faster (larger distances between the annual rings), adhesions dampen the sound and are very difficult to plane out. 

Feinjähriges Fichtenholz ohne jegliche Verwachsungen (Größe: 90x12mm)

Tip: Each board is taken exactly in the middle between two fingers and struck. Each usable board has its own beautiful tone. It is fascinating, but also frightening how many boards turn out to be unsuitable.

This means that more and more wood has to be planned. At this point it is not allowed to save money! Dressing

2. Dressing

The boards are now sorted lengthwise to the size of the soundboard. The surface must consist of two parts of approximately equal width (bass/discant). Now the spruce boards are dressed at the glue joints.

Tip: The boards should be planed a little bulbous. Each board is then approx. 1 mm thicker at 1m in the middle than at the ends. This gives the soundboard an internal preload and prevents it from tearing so easily when glued in, even with large fluctuations in humidity.

Verleimen des Resonanzbodens

3. Gluing

Never use normal white glue like ponal, bindan etc. in the sound area of the harpsichord! These include webs, attachment strips, cabinets and soundboards. White glue is elastic - the joints can work poorly and the sound is dampened. That is why most harpsichord makers use warm glue or synthetic glue that becomes as hard as warm glue.

To make planing the soundboard a lot of fun later, another

Tip: Almost every board can only be planed well in one direction. Therefore it makes sense to plane all the boards once by hand and turn them in the same direction.

Now each of the two halves of the soundboard (bass and treble) can be glued with the appropriate supplements and - not too much pressure. Since the boards have a bulbous shape, clamps at the ends are theoretically sufficient. After at least one night's rest, the surfaces can be mechanically dressed and planed to thickness. These are left 1 - 2 mm thicker than the final thickness that is later achieved with the hand plane. Now the two halves of the soundboard of the bass and the treble are glued together flush.

Hobeln quer zur Maserung

4. The coarse cut

The shape of the soundboard can now be cut out with an addition. Attention: The grain of the wood is not parallel to the cabinet wall in the bass, but diagonal, like the strings. This prevents the soundboard from splitting off from the cabinet wall in the bass.
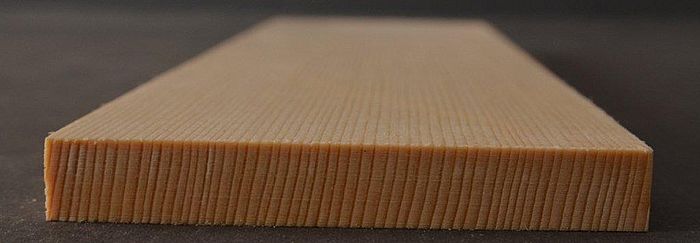
 5. Planing out

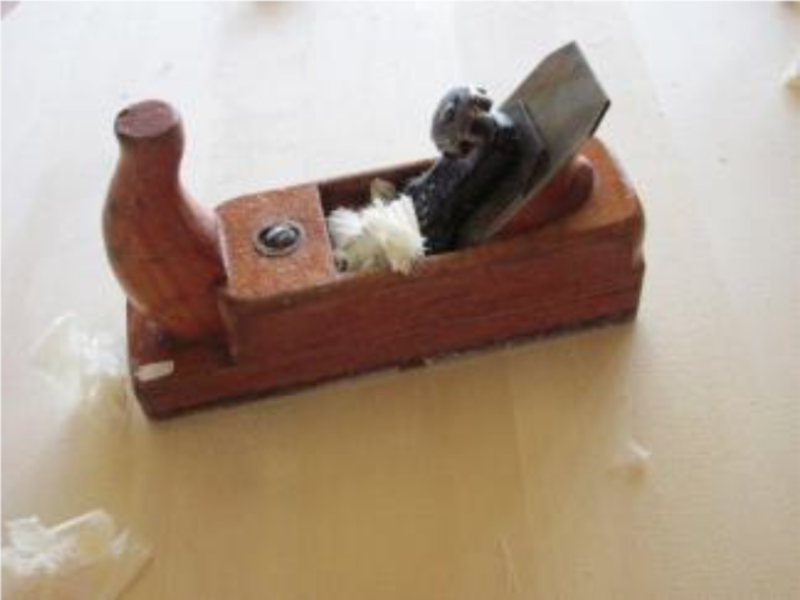
The prerequisite is a very good planer, a clean plane sole, a super-sharp blade, optimum settings and a stable and flat surface on which the soundboard lies during Planung. The upper side is the first to be smoothed and thus finished, because it can no longer be machined after the underside has been thinned out. The underside is thinned out exactly according to the plan to the edges. The strongest area is in the middle - with my instrument it is 4 mm. The soundboard was thinned out to 2.3 mm at the edge of the treble.

Tip: Since large quantities of wood have to be removed, the chip is strongly adjusted. There is a risk of deep tearing. To prevent this, the so-called "dwarf" planes at right angles to the wood grain and initially accepts a rough surface. For fine planing, the grain is used again.

Tip: With a handful of compressed chips, the wood can be polished up. By heating the resin of the spruce is distributed on the soundboard. This results in an elegant surface and also protects against dor

In this condition the soundboard is very elastic and sensitive. Before it is further processed, it should rest for as long as possible. For this reason I have put this complex topic at the beginning of all work.


Tip: When the soundboard is placed in the sun, the almost white spruce wood naturally darkens and gets a golden colour. In a later contribution, the soundboard will then be further processed. Do you have any questions? I look forward to exchanges and suggestions.

The next blog post will be about veneering - and that's not possible...

read on