5. VENEER - THE CUTTING

published April 15, 2013 by Johannes Huefken

In the last blog we got to know the tools for veneer processing. Today, several techniques are to be applied to facilitate the cutting and assembling of the veneers.

We would like to approach this chapter in 5 points:

  1. Large formats
  2. The assembling
  3. Special shapes
  4. The subtle difference
  5. Attention - Error!
Two planks for the production of decorative strips

1. large formats:

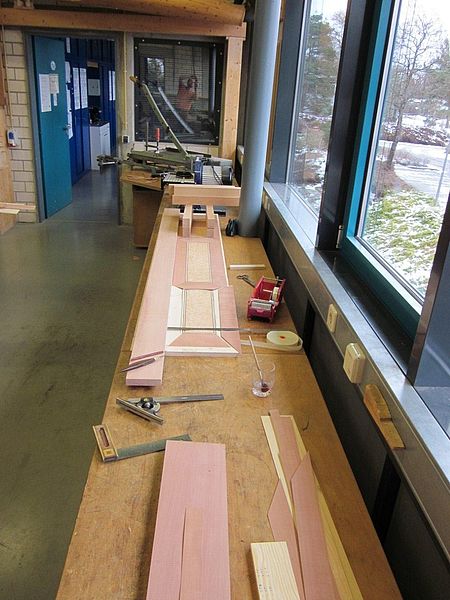
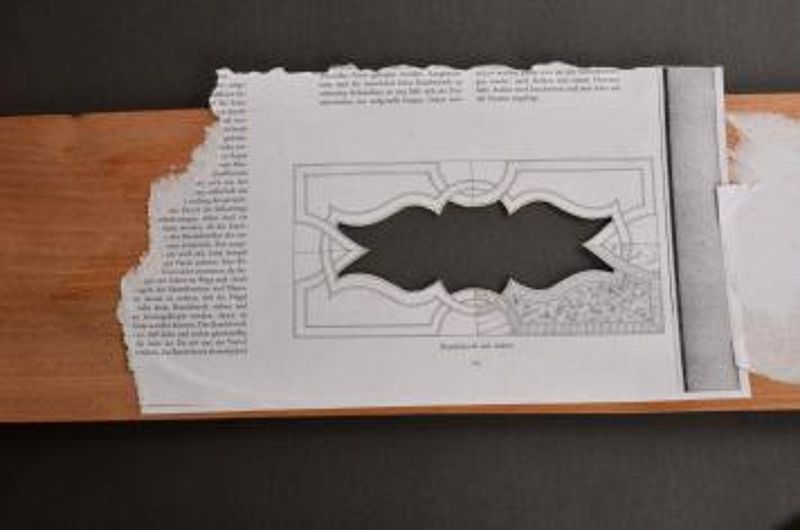
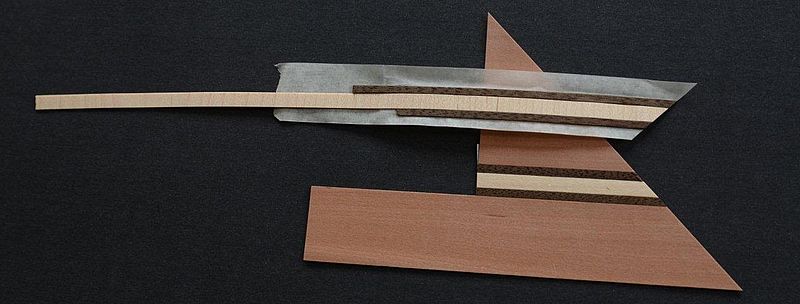
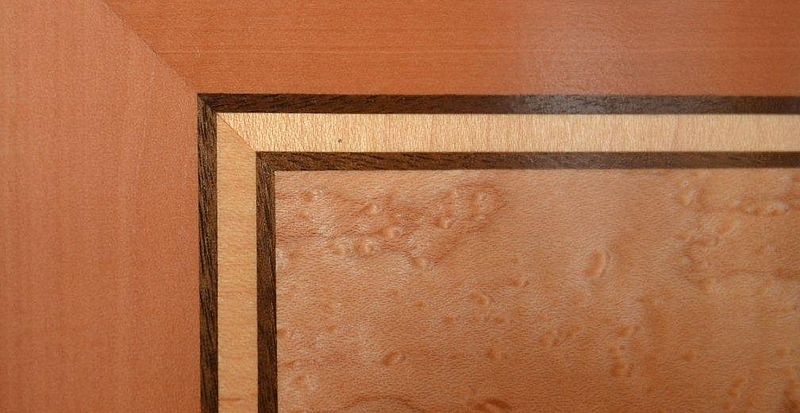
A tip for strip cutting and cutting large formats without a circular saw:Two planks for the production of decorative stripsTension the veneer sheet between two planks with clamps. One board serves as a cutting board, the second one as a ruler. The desired veneer width is displayed under the ruler. The strips may only be pre-cut during the first pull, thus reducing tearing. These planks can also be used as an aid for gluing decorative strips. 3 mm of the adhesive veneer tape are stretched with the glue side upwards, under the ruler (upper board). The ruler serves as a stop, so we get straight decorative strips. In the background of the photo you can see a wooden scantlings lying on the decorative strip. When the thin strips of veneer come into contact with water, you want to roll yourself. The cantle is used to counteract this.


Veneer cutting for the concave

2. The assembling

On the next picture you can see that I worked from the inside out. Thus, the decorative strips of maple and walnut come to the rectangular cassettes of bird's-eye maple. Finally, the frames of Wild Service Tree are mitred around the cassettes.

paper lever shears

With the guillotine shears, the mitre angles that are frequently required can be recorded on the work surface. The self-built pressure ruler made of oak allows nothing to slip. This allows the smallest strips to be cut off. All veneer joints must be sealed with the adhesive tape. This also prevents glue from breaking through.

A tip for inserting shapes using the star as an example. Cut out each tip individually, then insert the selected type of wood. The ebony and the mahogany are already bigger than necessary glued. This area is placed under the cut-out in the maple. Now the lower veneer is torn, cut out and each tip inserted individually. This also applies to other inlays.


Waste: tip of the star made of maple
Star detail
glued on and cut out template
motif transferred to walnut, which is already inlaid here in the bird's-eye maple

3. special forms

To get special motives simply on the veneer, one can stick, as shown in the picture, a copy on a remaining veneer. The shape is cut out and placed as a mask on the final position of the veneer.

4. The subtle difference

Can you see the difference between the two maple veneer strips?

The overlying maple veneer strip is cross wood, the lower one is longitudinal wood.

Both are possible. Longitudinal wood is easier to produce (see point 1), transverse wood is more complex, as depending on the width of the veneer sheet (12-35 cm) the short strips have to be cut into pieces. But here a great play of colours is created when light falls on it. The first variant is simple and homogeneous. Decide what you like better.

5. attention error!

The veneer picture, which can be seen outside, would not have fit optically inside, since 80% of the surface is under the soundboard. So I decided to veneer the surfaces lengthwise inside. Although there is only a small veneer cross strut between the cassettes every 50cm, these cross struts have bent the entire front after pressing. The counter-voltage was missing. Unbelievable how a 0.4 mm thick veneer cross strut warps a 16 mm thick solid wood. That was a setback! I would have loved to saw it, but a lot of work had already flowed into this surface. After some time of abstinence from the workshop I decided to get involved with the not a little distorted housing elements. More about this in a later chapter. We learn from this: A veneered top surface always requires an adequate rear surface. In the next article the veneer is glued on. A tricky task has to be solved.

read more